 Tempusxr
- Documentation
- Exemples de suivi d'images
Multi-cibles
Un seul fichier cible avec plusieurs images, et un contenu différent sur chacune. La page suit une image à la fois, celle que la caméra voit.
Essayer
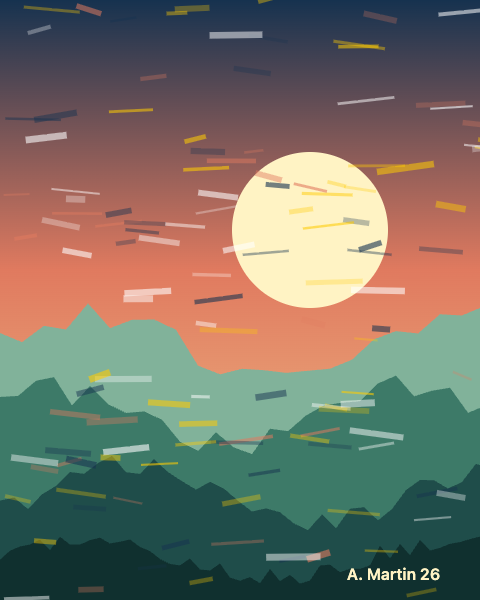
Ouvrez les démos sur un téléphone : la caméra a besoin d'une page sécurisée. Puis visez l'image ci-dessous, affichée sur un second écran ou imprimée.


A-Frame
Chaque tempusxr-image-target a un index : la position de l'image dans le fichier .txr (carte, affiche, tableau). Fabriquez le fichier avec le compilateur d'images, en donnant les images dans cet ordre.
<!doctype html>
<html lang="en">
  <head>
    <meta charset="utf-8" />
    <meta name="viewport" content="width=device-width, initial-scale=1, viewport-fit=cover" />
    <title>Multi-targets (A-Frame)</title>
    <!-- A-Frame, Tempusxr and the image tracker, as plain script tags. -->
    <script src="/node_modules/aframe/dist/aframe-v1.8.0.min.js"></script>
    <script src="/packages/sdk-aframe/dist/index.umd.cjs"></script>
    <script src="/packages/sdk-tracker-image/dist/index.umd.cjs"></script>
  </head>
  <body>
    <!--
      One .txr file with three images: card.png, poster.png and art.png (index 0, 1, 2).
      Each image gets its own content. Only one is followed at a time (maxTrack defaults to 1).
    -->
    <a-scene
      tempusxr="tracker: image; targets: /examples/tracking/multi.txr"
      renderer="alpha: true"
      vr-mode-ui="enabled: false"
    >
      <a-camera></a-camera>
      <a-light type="ambient" intensity="0.9"></a-light>
      <a-light type="directional" position="0.5 1 1" intensity="0.8"></a-light>

      <a-entity tempusxr-image-target="index: 0">
        <a-box position="0 0 0.12" scale="0.25 0.25 0.25" color="#fecb02"></a-box>
      </a-entity>
      <a-entity tempusxr-image-target="index: 1">
        <a-sphere position="0 0 0.2" radius="0.18" color="#ff5e62"></a-sphere>
      </a-entity>
      <a-entity tempusxr-image-target="index: 2">
        <a-cone
          position="0 0 0.2"
          rotation="90 0 0"
          radius-bottom="0.15"
          height="0.35"
          color="#3d7a68"
        ></a-cone>
      </a-entity>
    </a-scene>
  </body>
</html>
Three.js
tracker.anchors a une ancre par image, dans l'ordre du fichier. Attachez un groupe différent à chacune.
<!doctype html>
<html lang="en">
  <head>
    <meta charset="utf-8" />
    <meta name="viewport" content="width=device-width, initial-scale=1, viewport-fit=cover" />
    <title>Multi-targets (Three.js)</title>
    <!-- Three.js with the SDK, as a page without a bundler loads it. -->
    <script type="importmap">
      {
        "imports": {
          "three": "/node_modules/three/build/three.module.js",
          "@tempusxr/sdk-core": "/packages/sdk-core/dist/index.js",
          "@tempusxr/sdk-three": "/packages/sdk-three/dist/index.js",
          "@tempusxr/sdk-tracker-image": "/packages/sdk-tracker-image/dist/index.js"
        }
      }
    </script>
    <style>
      html,
      body {
        margin: 0;
        height: 100%;
        background: #111;
      }
    </style>
  </head>
  <body>
    <!--
      One .txr file with three images: card.png, poster.png and art.png (index 0, 1, 2).
      Each image gets its own content. Only one is followed at a time (maxTrack defaults to 1).
    -->
    <div id="ar"></div>
    <script type="module">
      import * as THREE from 'three';
      import { create } from '@tempusxr/sdk-three';
      import '@tempusxr/sdk-tracker-image';

      const ar = create({ container: '#ar' });
      window.__ar = ar;
      const tracker = await ar.use('image', { targets: ['/examples/tracking/multi.txr'] });

      const shapes = [
        // card.png: a box
        [new THREE.BoxGeometry(0.25, 0.25, 0.25), '#fecb02', 0.12],
        // poster.png: a sphere
        [new THREE.SphereGeometry(0.18, 32, 16), '#ff5e62', 0.2],
        // art.png: a cone
        [new THREE.ConeGeometry(0.15, 0.35, 32).rotateX(Math.PI / 2), '#3d7a68', 0.2],
      ];
      shapes.forEach(([geometry, color, lift], index) => {
        const content = new THREE.Group();
        content.add(new THREE.AmbientLight(0xffffff, 1.2));
        const sun = new THREE.DirectionalLight(0xffffff, 1.5);
        sun.position.set(0.5, 1, 1);
        content.add(sun);
        const mesh = new THREE.Mesh(geometry, new THREE.MeshStandardMaterial({ color }));
        mesh.position.z = lift;
        content.add(mesh);
        ar.attach(tracker.anchors[index], content);
      });

      await ar.start();
    </script>
  </body>
</html>
À retenir
maxTrackvaut 1 par défaut : le traqueur suit une image à la fois, c'est le réglage le plus rapide.- Les trois images viennent des exemples finis, compilées ensemble dans
examples/tracking/multi.txr.